Advanced Frost Line Height Adjustment: Techniques for Optimizing Film Properties and Stability 2026
Frost line height (FLH) is the vertical distance from the die to the point where the molten bubble solidifies. Adjusting FLH is a primary control lever for film properties and bubble stability. A lower FLH (faster cooling) gives higher clarity (smaller spherulites) but traps more orientation, increasing tensile strength and reducing tear resistance. A higher FLH (slower cooling) allows more relaxation, improving tear resistance but reducing clarity and increasing haze. The optimal FLH depends on the product: for high-clarity packaging, a higher FLH (500-800 mm) is preferred; for high-strength shrink films, a lower FLH (300-500 mm) is used. The FLH is controlled primarily by the cooling air flow from the air ring (and IBC). Increasing air flow lowers the FLH; decreasing raises it. The adjustment should be gradual (e.g., 5% blower speed change at a time) and the bubble allowed to stabilize (30-60 seconds) before measuring. The FLH is measured using a scale or a laser rangefinder. In practice, operators set FLH based on the product recipe and then fine-tune based on film properties. To lower FLH: increase blower speed, or if using IBC, increase internal air flow. To raise FLH: reduce blower speed or internal air flow. The cooling air temperature can also be used; chilled air lowers FLH. In summary, FLH adjustment is a dynamic process that requires observation of the bubble and measurement of film properties. The operator should document the FLH and corresponding settings for each product to ensure repeatability.
When adjusting FLH, it is important to consider its interaction with line speed and output. Increasing line speed raises FLH (less cooling time), so cooling must be increased to maintain FLH. Conversely, decreasing line speed lowers FLH, so cooling must be reduced. The control system may have a feedforward that adjusts cooling based on speed changes. The FLH also affects the bubble diameter; changes in cooling can affect neck-in, so internal pressure may need adjustment. A common technique is to set the FLH first, then adjust the lay-flat width via internal pressure. The FLH should be uniform around the circumference; any asymmetry indicates uneven cooling, which can be corrected by cleaning the air ring and adjusting vanes. In practice, operators should use a camera or visual observation to check FLH regularly. If the FLH fluctuates, check for blower speed instability or screen clogging. In conclusion, advanced FLH adjustment is a key skill for blown film operators, enabling them to fine-tune film properties and maintain stable production. Consistent FLH control leads to consistent quality.
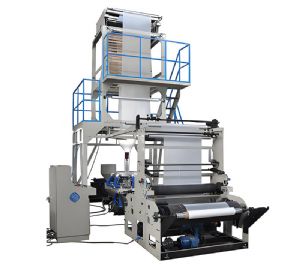
Blown Film Machine
Step-by-step FLH adjustment: 1) Determine target FLH from product recipe (e.g., 500 mm). 2) Note current blower speed and IBC settings. 3) If FLH is too high (above target), increase blower speed by 5% (or increase IBC flow). 4) Wait 30-60 seconds for stabilization. 5) Measure FLH; repeat until target is reached. 6) If FLH too low, decrease blower speed. 7) After FLH set, check lay-flat width; adjust internal pressure if needed. 8) Check film properties (haze, tear) and adjust FLH if needed. 9) Record final settings for recipe. Interaction with line speed: If increasing line speed, increase cooling to maintain FLH. If decreasing line speed, decrease cooling. Feedforward control: Use speed signal to adjust blower speed proactively. Troubleshooting: Uneven FLH: clean air ring and adjust vanes. FLH fluctuation: check blower speed stability, air leaks, or screen clogging. If FLH cannot be lowered: check blower capacity, clean air ring, or use chilled air. If FLH too low: reduce cooling or increase line speed. In practice, the operator should use a laser pointer or camera to measure FLH accurately. Regular calibration of FLH measurement tools is recommended. In conclusion, mastering FLH adjustment enables operators to optimize film properties and bubble stability, reducing scrap and improving quality.
